From mindful programming to reproducible research
This website tries to highlight key practices in programming and reproducibility. I am doing a shameless copy of better and more complete tutorials like:
- Cecile Ane’s class on Computing Tools
- Jenny Bryan’s Happy git with R
- Karl Broman’s class on Tools for Reproducible Research
- UW-Madison software carpentry
So, make sure to check these resources too.
The original repo for this notes is mindful-programming where I will keep updating these notes.
0. Why do we care about best practices and reproducibility?
- Your closest collaborator is you six months ago, and you do not reply to emails – Karl Broman
- Everything via code -> avoid embarrassment, save time, avoid mistakes
- The most important tool is the mindset, when starting, that the end product will be reproducible – Keith Baggerly
- Assume that everything that you are doing right now will need to be redone at some point in the future: be prepared
1. Best computing practices
- Write programs for people, not computers
- Let the computer do the work (functions, scripts)
- Make incremental changes (use version control)
- Don’t repeat yourself (or others): no copy-paste!
- Plan for mistakes (add assersions to programs, code defensively)
- Optimize software only after it works correctly
- Document design and purpose, not mechanics
- Collaborate (github pull requests/issues)
1.1 Organization of projects
This section is inspired by Karl Broman’s notes.
- Put everything in a common directory. If using RStudio, for example, create a new project which will contain all the files corresponding to this project. You can link this project to a github repository (see below)
- Separate raw from processed data; it is tempting to hand-edit datafiles: don’t!
- Separate code from data
- Don’t use absolute paths
- Use readme and markdown (
md) files to explain structure of folder and files within folder/subfolders; create logfiles as a “Dear diary” with details of analyses. See this Markdown cheatsheet - Use R Markdown (
Rmd) files for data analyses and reports. See this R Markdown tutorial - Slow down and think about file/folder organization
1.2 Write clear code
This section is inspired by Karl Broman’s notes.

- First code that works, then efficiency
- Readable for humans; code format: indentation, white space, meaningful names
- Modular, reusable (no copy-paste of lines: functions)
- Write general code (not specific to data/situation at hand)
- No global variables ever!
- Comment code but mostly big picture, major sections, input/output, not minor details that can be understood from the code itself; “plan to spend 1/4 time commenting”, Karl Broman
- Meaningful error messages; tests/checks for inputs; document assumptions on input
- Statistician: rows=individuals, columns=variables
- Machine learning guy: rows=variables, columns=individuals
- Code defensively; handle cases that “can’t happen”
- Slow down, breathe, don’t be in a hurry!
1.3 Version control with git
1.3.1 Why version control with git/github?

- Keep track of history of changes of files in your project
- Time travel: access to files from the past
- Peace of mind about breaking stuff:
Using a Git commit is like using anchors and other protection when climbing. If you’re crossing a dangerous rock face you want to make sure you’ve used protection to catch you if you fall. Commits play a similar role: if you make a mistake, you can’t fall past the previous commit. Coding without commits is like free-climbing: you can travel much faster in the short-term, but in the long-term the chances of catastrophic failure are high! Like rock climbing protection, you want to be judicious in your use of commits. Committing too frequently will slow your progress; use more commits when you’re in uncertain or dangerous territory. Commits are also helpful to others, because they show your journey, not just the destination – Hadley Wickham
- Collaborating with others
- See what a github repo looks like
- More reading: PLoS Comp Bio
1.3.2 Setting everything up
1.3.4 Now, you want to start your project: git basics
When you are starting your project, you basically need to create the local folder, the github repository and the RStudio project. The order of these steps can vary, but I have found that the more straight-forward order is the following:
- Create a github repository
- Git clone the github repository into a local folder in your computer
- Make it an RStudio project (optional, mostly for R projects)
- Make local changes, git add, git commit, git push
1. Create a github repository
- Click the green “New” button.
- Choose the repository name:
myProject - Choose to make the repository public
- Choose “yes” to initialize this repository with a README file
2. Git clone in a local folder
pwd ## make sure you are in the right place
git clone https://github.com/YOU/myProject.git
Here you substitute YOU with your github username.
3. Make it an RStudio project
File > New Project > Version Control > Git and copy https://github.com/YOU/myProject.git
4. Make local changes:
cd myProject
open README.md
Change the file, then
git add .
git commit -m "updated readme"
git push
1.3.5 Other useful git commands
git status          ## check status of repo
git log             ## log of commits
git log --oneline
git diff            ## compare versions
git pull            ## pull commits from remote (github)
git pull --ff-only  ## pull commits avoiding merge issues
1.3.6 Creating branches
The main branch is master. New branches are perfect for development of side work or to allow people working in parallel.
Create a new branch:
git branch new-branchChange to the new branch:
git checkout new-branchOnce in the new branch, you can make changes to the files, and these changes will only appear in the branch (not in master).
Based on Karl Broman’s code, I changed my .bash_profile file to write the name of the branch where I am in the prompt.

See more details in the bash_profile.md file.
When you want to move to a different branch (or back to master),
you should commit (or stash) your work in a branch:
git commit --all -m "WIP"
git checkout master
When you move back to the new branch, perhaps you want to reset back to the previous commit. This command does not affect any of the files, only the commits:
git checkout new-branch
git reset HEAD^
You can also choose to reset to a specific commit by typing git log first and choosing the specific SHA.
After you’ve done work on a branch, and you are satisfied with the code, you can merge the changes to the master branch:
git checkout master
git merge new-branch
Merging issues? Do not panic! Breathe and keep in mind that your work is safe and secure by the power of git. git status helps you identify the problem.
From Jenny Bryan’s website:
git status
# On branch master
# You have unmerged paths.
#   (fix conflicts and run "git commit")
#
# Unmerged paths:
#   (use "git add <file>..." to mark resolution)
#
#     both modified:      index.html
#
# no changes added to commit (use "git add" and/or "git commit -a")
The file index.html needs to be resolved. We can then open the file to see what lines are in conflict.
<<<<<<< HEAD:index.html
<div id="footer">contact : email.support@github.com</div>
=======
<div id="footer">
 please contact us at support@github.com
</div>
>>>>>>> new-branch:index.html
In this conflict, the lines between <<<<<< HEAD:index.html and ====== are the content from the branch you are currently on. The lines between ======= and >>>>>>> new-branch:index.html are from the feature branch we are merging.
To resolve the conflict, edit this section until it reflects the state you want in the merged result. Pick one version or the other or create a hybrid. Also remove the conflict markers <<<<<<, ====== and >>>>>>.
<div id="footer">
please contact us at email.support@github.com
</div>
Now run git add index.html and git commit to finalize the merge.
Keep in mind that you can always abort a merge with git merge --abort.
Do you think you are prepared to tackle any branch problem? Try this example
1.3.7 Forking other people’s repository
Sometimes you identify a repository that does work that you are interested in, but perhaps you would like to do some modification. You can fork this repository, and work on the forked version as if it were your own repository (everything we’ve studied applies).

Image from Jenny Bryan
For this example (from Jenny Bryan’s website), the original repository is OWNER/REPO, and after clicking Fork on github, you will have a YOU/REPO.
It is usually recommended to work on a branch when making changes to a forked repository. This is especially true if you intend to create a pull request (more below) so that the original owner can incorporate your changes to the original repository.
You will then follow the same steps as in “Git basics”: git clone, work, git add, git commit, git push.
If you look closely at your local repo, you will see that it points at your remote version of the repository:
$ git remote -v
origin  https://github.com/YOU/REPO.git (fetch)
origin  https://github.com/YOU/REPO.git (push)
which allows you to push/pull to this forked repository.
But you will most likely also like to pull changes from the original repository

Image from Jenny Bryan
So, you can add the original repo OWNER/REPO as a remote in your repo:
git remote add upstream https://github.com/OWNER/REPO.gitHere we are choosing the name upstream, which is standard practice for the original repository.
Then, when we check the remotes in your local repository, you can see that you have origin pointing at your own forked version YOU/REPO, and upstream pointing at the original repo OWNER/REPO:
$ git remote -v
origin    https://github.com/YOU/REPO.git (fetch)
origin    https://github.com/YOU/REPO.git (push)
upstream  https://github.com/OWNER/REPO.git (fetch)
upstream  https://github.com/OWNER/REPO.git (push)
Now you can pull changes from upstream to keep your forked repo updated with the original repo:
git pull upstream master --ff-onlyAfter you’ve done work in your fork, and are ready to create a pull request in github, see here.
1.3.8 Troubleshooting

Reference: xkcd
1.3.8.1 Amending commits
You might want to do sequential progress with the code, but not necessarily have one commit per every single change. You can use git commit --amend to re-write specific commits.
For example, you do some work, and then commit the changes as work-in-progress: git commit -m "WIP". The history looks like A -- B -- C -- WIP.
You make more changes, and want to re-write the previous commit (WIP): git commit --amend --no-edit. The history is the same A -- B -- C -- WIP, but now the changes in WIP correspond to the two previous commits.
Continue working like this, until you are satisfied with the work:
git commit --amend -m "awesome changes"
git push
Your history – and that on GitHub – look like this:
A -- B -- C -- DThere is only one clean beautiful commit D, but in fact, it is the combination of multiple tiny steps.
1.3.8.2 Resetting back to previous commits
Imagine that you are working on some changes , but you keep getting errors, and problems, so you want to fall back to a previous stage of the code when everything worked fine.
This is the history that you have, with git commit -m "WIP" being the last commit:
A -- B -- C -- WIPTo go back to the code before your WIP commit, you type:
git reset --hardwhich is implicitly the same as
git reset --hard HEADwhich says: “reset my files to their state at the most recent commit”.
1.3.8.3 Git push/pull issues
Imagine if two people are pushing changes to the same repository. You are working locally, but forget to do git pull before make any changes (or perhaps you and the other people are working at the exact same time and the other person pushes their changes before you). When you try to push your changes, you can’t, because your code has diverged from the remote code:
$ git push
To https://github.com/YOU/REPO.git
 ! [rejected]        master -> master (fetch first)
error: failed to push some refs to 'https://github.com/YOU/REPO.git'
hint: Updates were rejected because the remote contains work that you do
hint: not have locally. This is usually caused by another repository pushing
hint: to the same ref. You may want to first integrate the remote changes
hint: (e.g., 'git pull ...') before pushing again.
hint: See the 'Note about fast-forwards' in 'git push --help' for details.
In the abstract, this is the state on github:
A -- B -- C (on GitHub)And this is your local state:
A -- B -- D (what you have)The easiests thing is to do git pull and then work out the merging issues (like with branches):
$ git pull
Auto-merging foo.R
CONFLICT (content): Merge conflict in foo.R
Automatic merge failed; fix conflicts and then commit the result.
You just have to go to foo.R and pick which version you want to keep of the merging conflict, then git add and git commit.
After this, you get this history:
      Remote: A--B--C
Local before: A--B--D
Local after: A--B--D--(merge commit)
                \_C_/
A more elegant way to handle these cases is with git pull --rebase:
$ git pull --rebase
First, rewinding head to replay your work on top of it...
Applying: Take max
We’ve achieved this:
      Remote: A--B--C
Local before: A--B--D
Local after: A--B--C--D
The bad news is that as with git pull, it is still possible to get merge conflicts with git pull --rebase, so you might need to merge conflicts anyway.
You can always do git rebase --abort to back out.
1.4 Testing code
This section is inspired by Karl Broman’s notes.
You want to test your code, but more importantly, you want to continuously test your code as you introduce more changes (preferably automated testing).
Different types of tests:
- Check inputs
- Stop if the inputs aren’t as expected.
- Unit tests
- For each small function: does it give the right results in specific cases?
- Integration tests
- Check that larger multi-function tasks are working.
- Regression tests
- Compare output to saved results, to check that things that worked continue working
1.4.1 Check inputs with R package assertthat
You are creating an R function winsorize that limits extreme values of a vector. You want to include some assert_that statements to make sure that the input arguments are what you expect:
#' import assertthat
winsorize <-
function(x, q=0.006)
{
if(all(is.na(x)) || is.null(x)) return(x)
assert_that(is.numeric(x))
assert_that(is.number(q), q>=0, q<=1)
lohi <- quantile(x, c(q, 1-q), na.rm=TRUE)
if(diff(lohi) < 0) lohi <- rev(lohi)
x[!is.na(x) & x < lohi[1]] <- lohi[1]
x[!is.na(x) & x > lohi[2]] <- lohi[2]
x
}
1.4.2 Unit tests with R package testthat
Now, you want to make sure that the winsorize function returns what it is supposed to:
test_that("winsorize works for small vectors", {
x <- c(2, 3, 7, 9, 6, NA, 5, 8, NA, 0, 4, 1, 10)
result1 <- c(2, 3, 7, 9, 6, NA, 5, 8, NA, 1, 4, 1, 9)
result2 <- c(2, 3, 7, 8, 6, NA, 5, 8, NA, 2, 4, 2, 8)
expect_identical(winsorize(x, 0.1), result1)
expect_identical(winsorize(x, 0.2), result2)
})
1.4.3 Integration tests in tests folder
You can store test functions in the tests folder, for example, tests/testthat.R:
library(testthat)
test_check("mypkg")
1.4.4 Automated testing
You can perform automated tests with Codecov within github. Learn more about Codecov here.
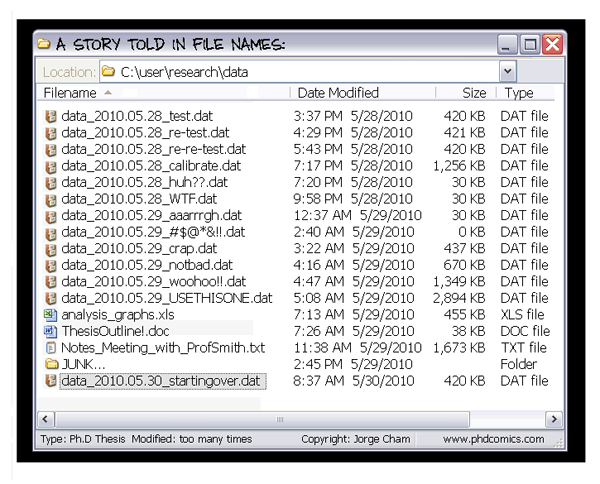
2. Relax
- Enjoy the process, make mistakes (git will catch you), learn as you go
- Code with purpose, be present, be mindful